Find Your REAL Fans For $1/Day on Instagram | Tiny Tutes
7/6/2022 by Shae Langford
Quickly and easily deploy time-tested marketing campaigns with Indepreneur's INDIEPRO training library. Become an INDIEPRO member and learn how Indepreneur can help you break out of your current music scene, build a trackable fan base, and sell music and merchandise. Learn more now!
One of the biggest challenges musicians face when trying to build a fan base online is leveraging digital marketing on a poor man’s budget.
In this article, we’re going to break down a simple ad strategy to grow your IG followers with real people that dig your music for as little as $1/day. You'll learn a how to set-up and deploy this strategy as well as some tips on what to expect and how to manage it over time.If you’re like me, you got a tight grip on your wallet. It can be hard to find the extra $ to invest in growing your music career. Spending $10/day on social advertising may not be accessible to you. Or maybe the thought of setting up an ad account just freaks you out…
“There are too many buttons and knobs and what if I do something wrong?”
I get it. This strategy I’m about to share with you was quick and easy to set up and I was able to double my followers in just a few short months while also making quality and meaningful connections with brand new people who really dig my music along the way. And you can too! So let’s get into it…
Step 1:
Make Sure Your Artist Profile Is a Business Account
Log into your artist Instagram account on your mobile device and make sure your profile is set up as a business account. Certain features I mention in this tutorial won’t be available to you if you don’t have your artist profile set up this way.
If you’re not sure how to do this you can follow this quick guide here before continuing: https://help.instagram.com/502981923235522
Step 2:
Select a Post
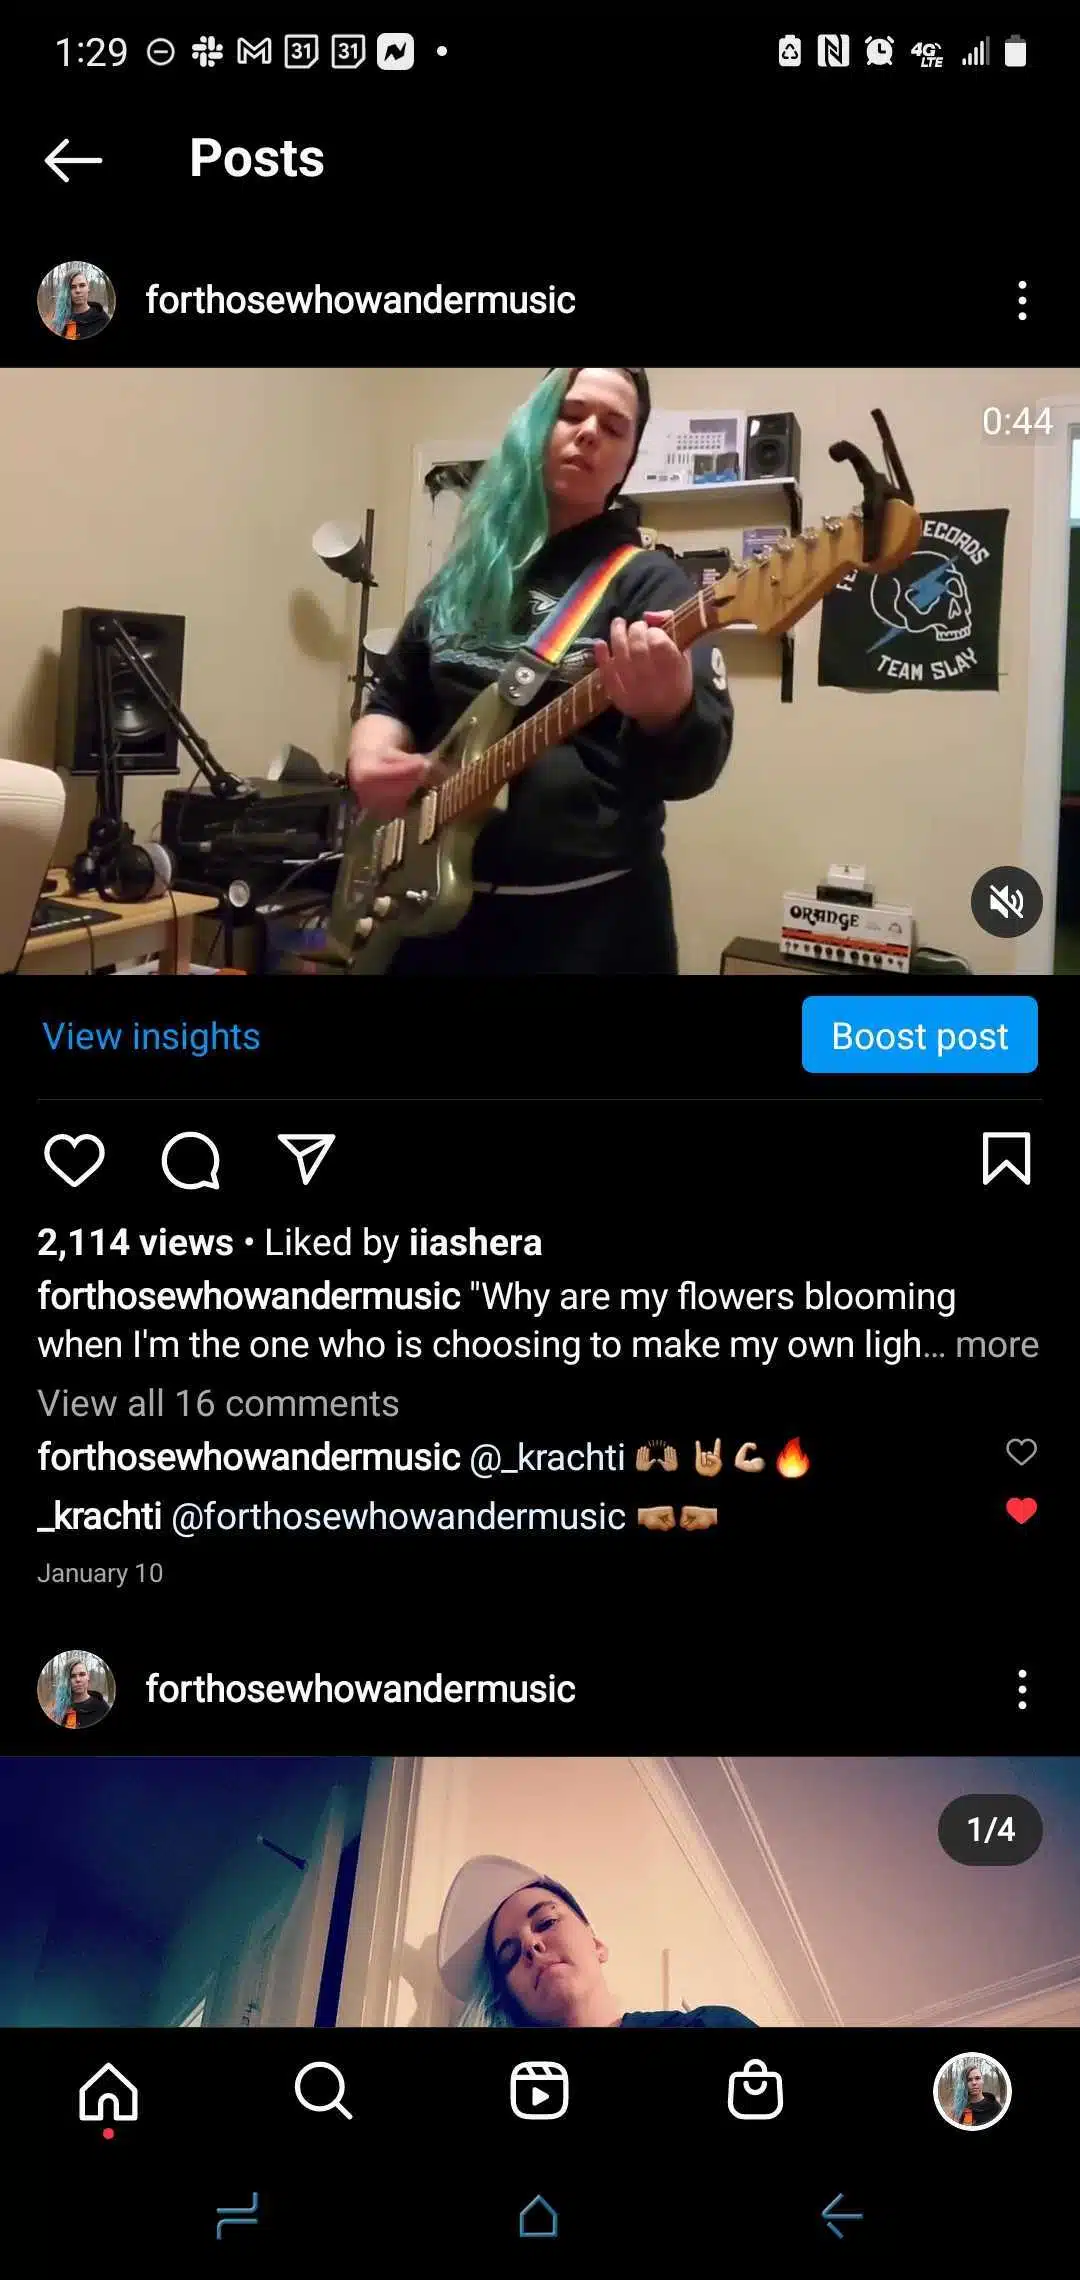
Next you’ll want to select a post to apply this strategy to. Since you’re goal here is to build awareness and gain new fans for your music, you’ll want to select a video post. Preferabbly one of you performing one of your songs.
Step 3:
Set Your Goal
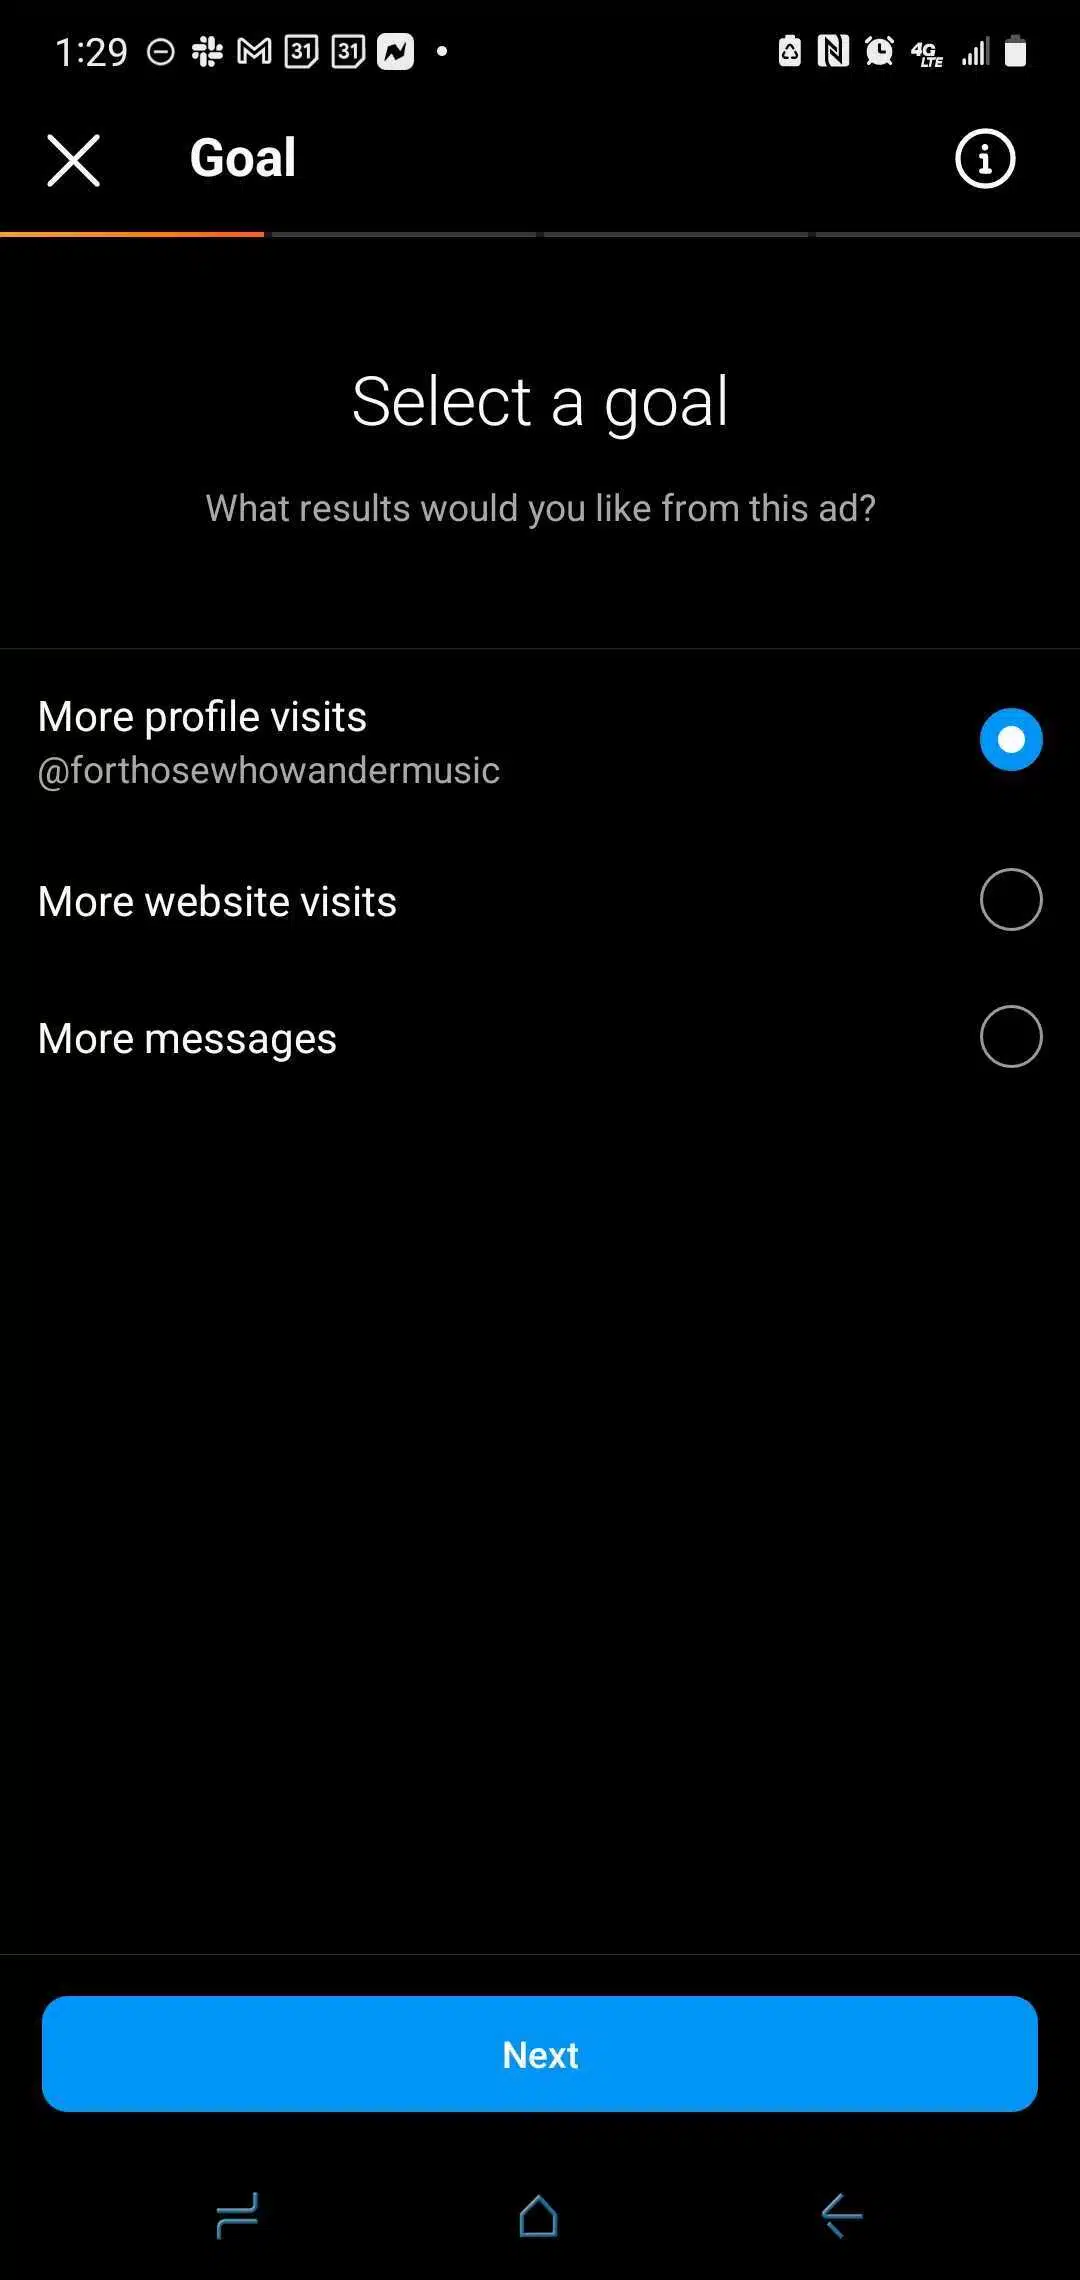
Once you select the post you want to boost, tap the blue boost button. Next, you’ll be asked to “select your goal” and will be presented with the following 3 options…
1. More Profile Visits
2. More Website Visits
3. More Messages
More profile visits pushes people to your Instagram profile and gives them an opportunity to consume more of your content and decide whether or not they want to follow you. More website visits pushes people to a link. This is useful if you’re running a sale or trying to get more email subscribers etc. And more messages of course is if you want to get more traffic in your DMs. For this strategy we’re going to select “More Profile Visits” because we want to grow our followers.
Step 4:
Select Target Audience
Here you have the option to create a new audience, select one you’ve already used, or choose “Automatic.” Automatic means that Instagram will target people who are most like the followers you already have. It is Instagram’s simplified version of Facebook Ads Manager’s “Lookalike Audience.” However, if your followers include bots, fake accounts, a mish mash of people that don’t really represent your brand well, or low engagement, you may want to hold off on using this until you are able to clean up your followers and gather higher quality data.
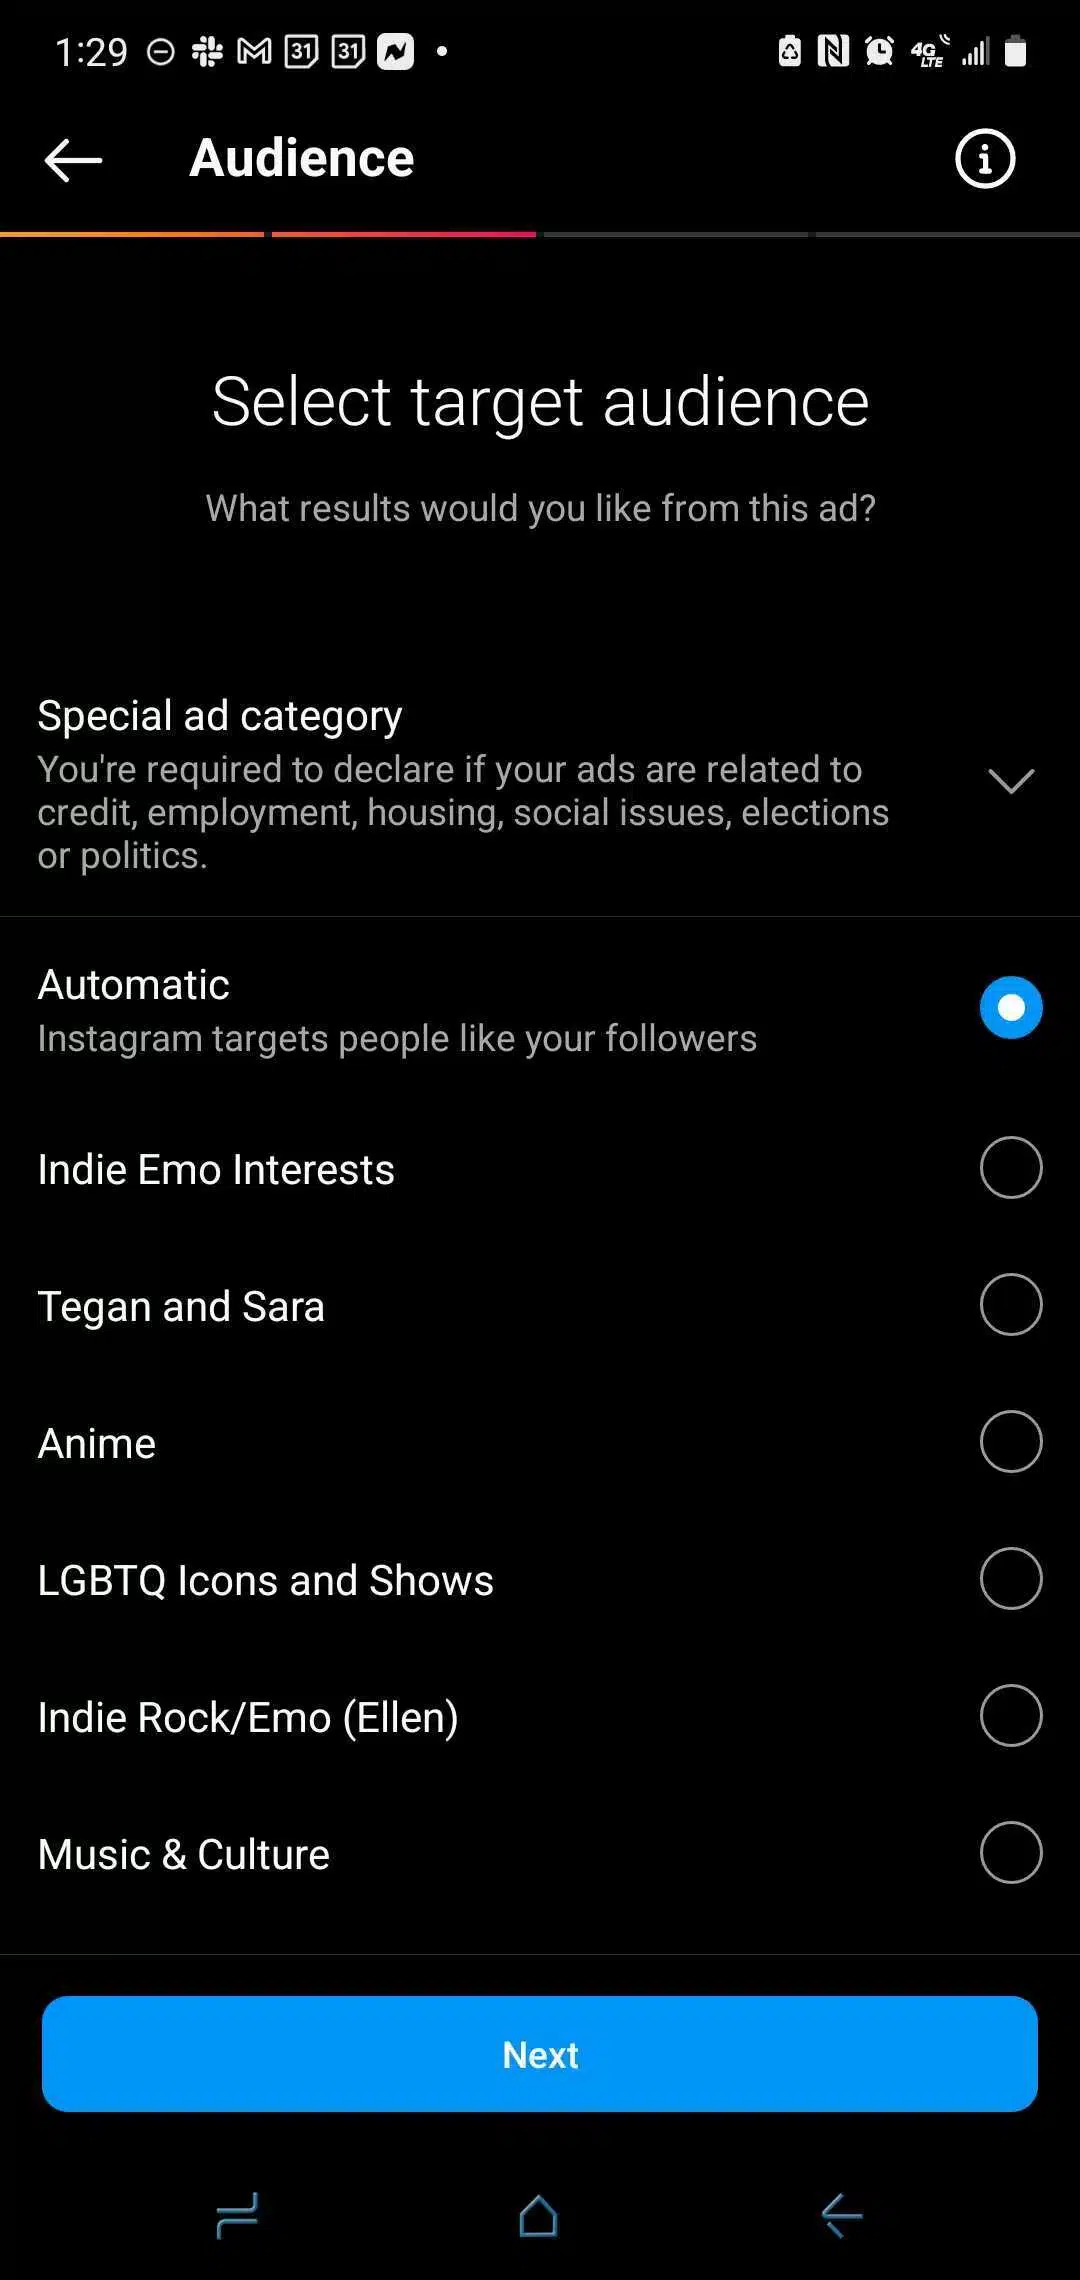
I suggest creating a new audience by selecting “Create your own” at the bottom of the screen. You’ll then be prompted to select your locations.
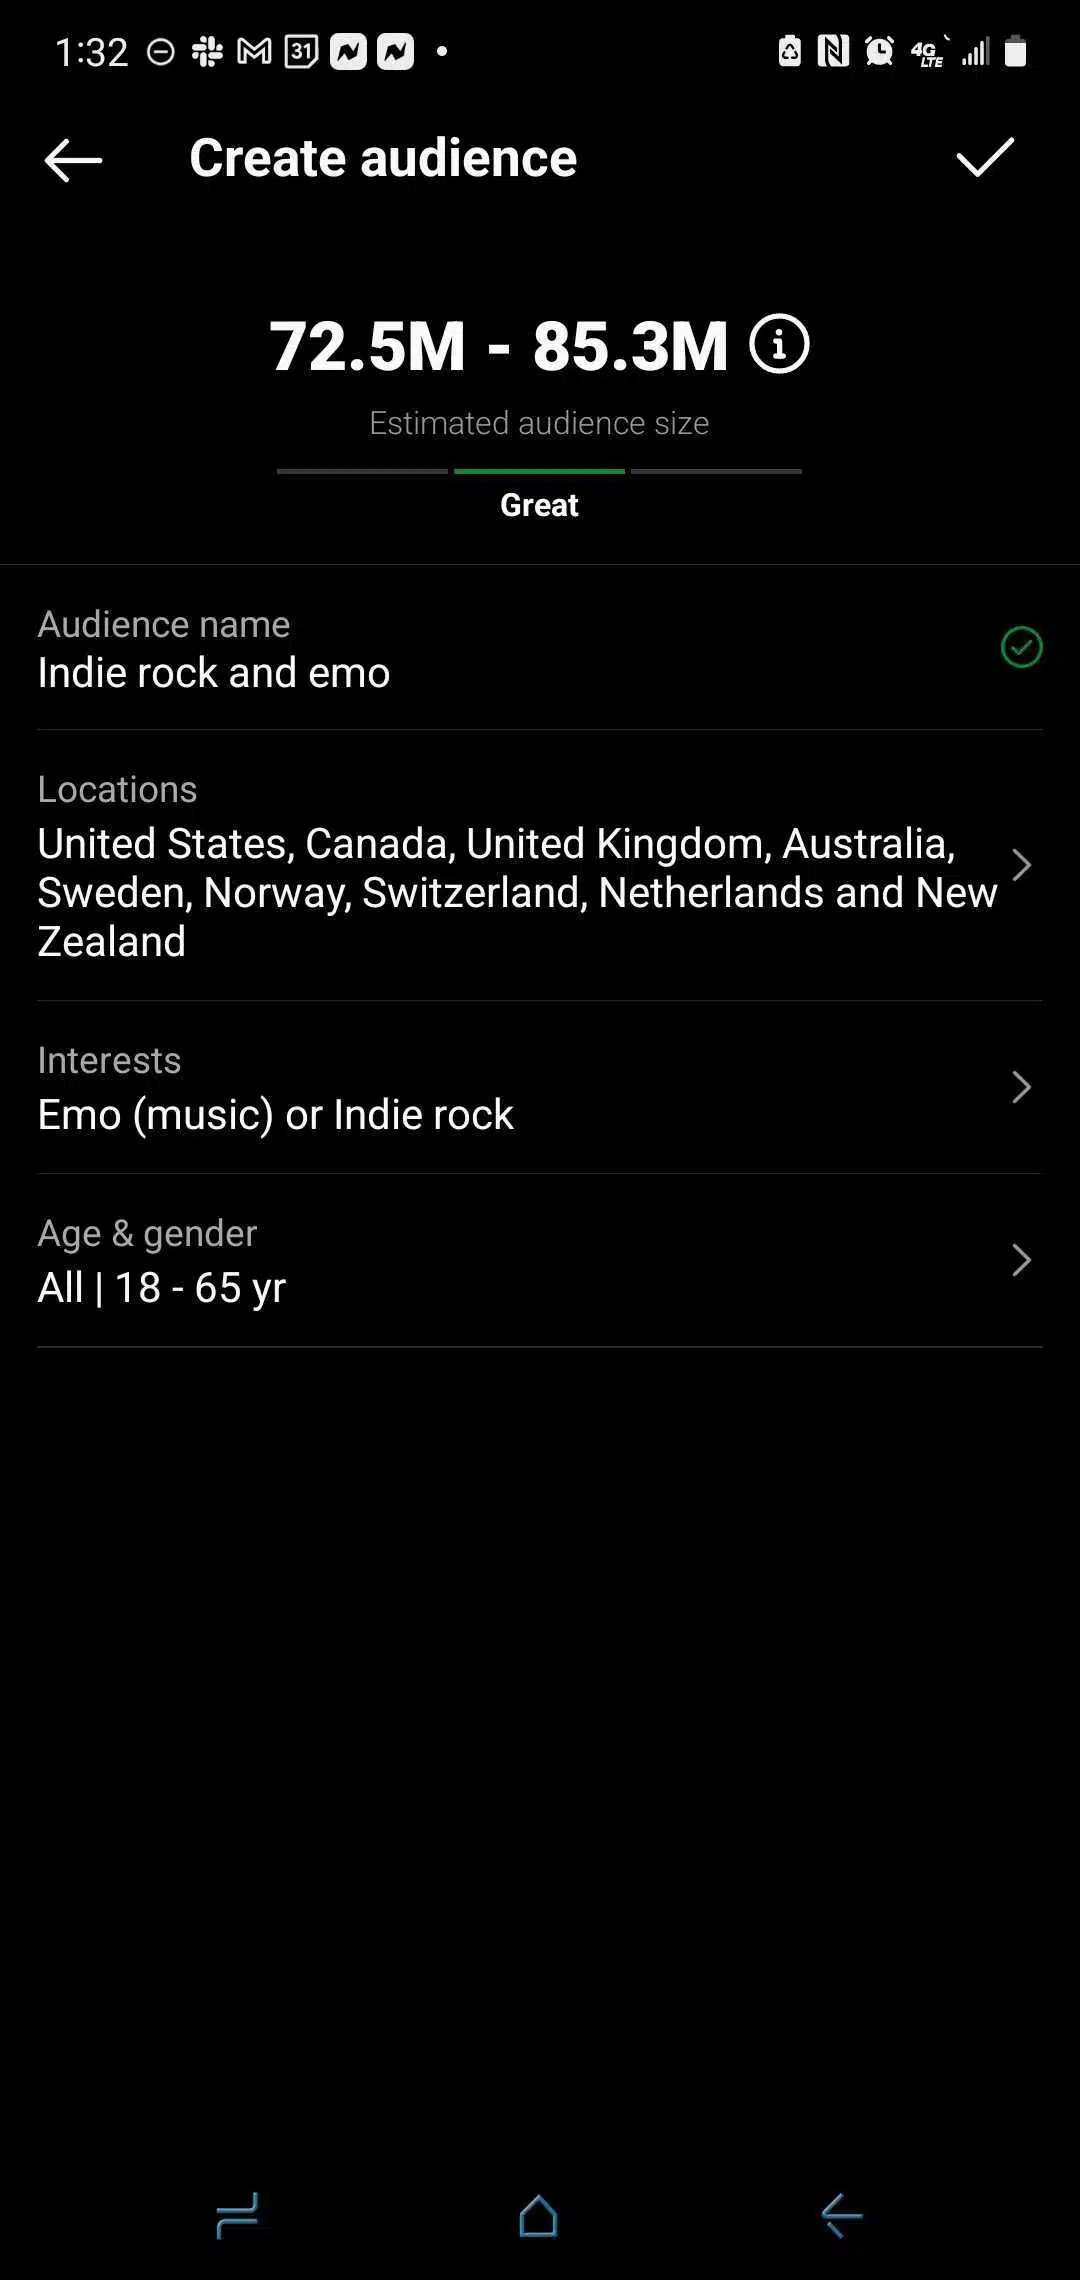
This part is important, because if you don’t select what we call “Green light countries” you risk flooding your profile with bots. So, you’ll want to select the following…
1. United States
2. Canada
3. United Kingdom
4. Australia5. Sweden
6. Norway
7. Switzerland
8. Netherlands
9. New Zealand
*NOTE* normally we include Germany and Denmark in this list, however we’ve been noticing some questionable traffic coming from these two countries recently so we’ve excluded them from this list for now.
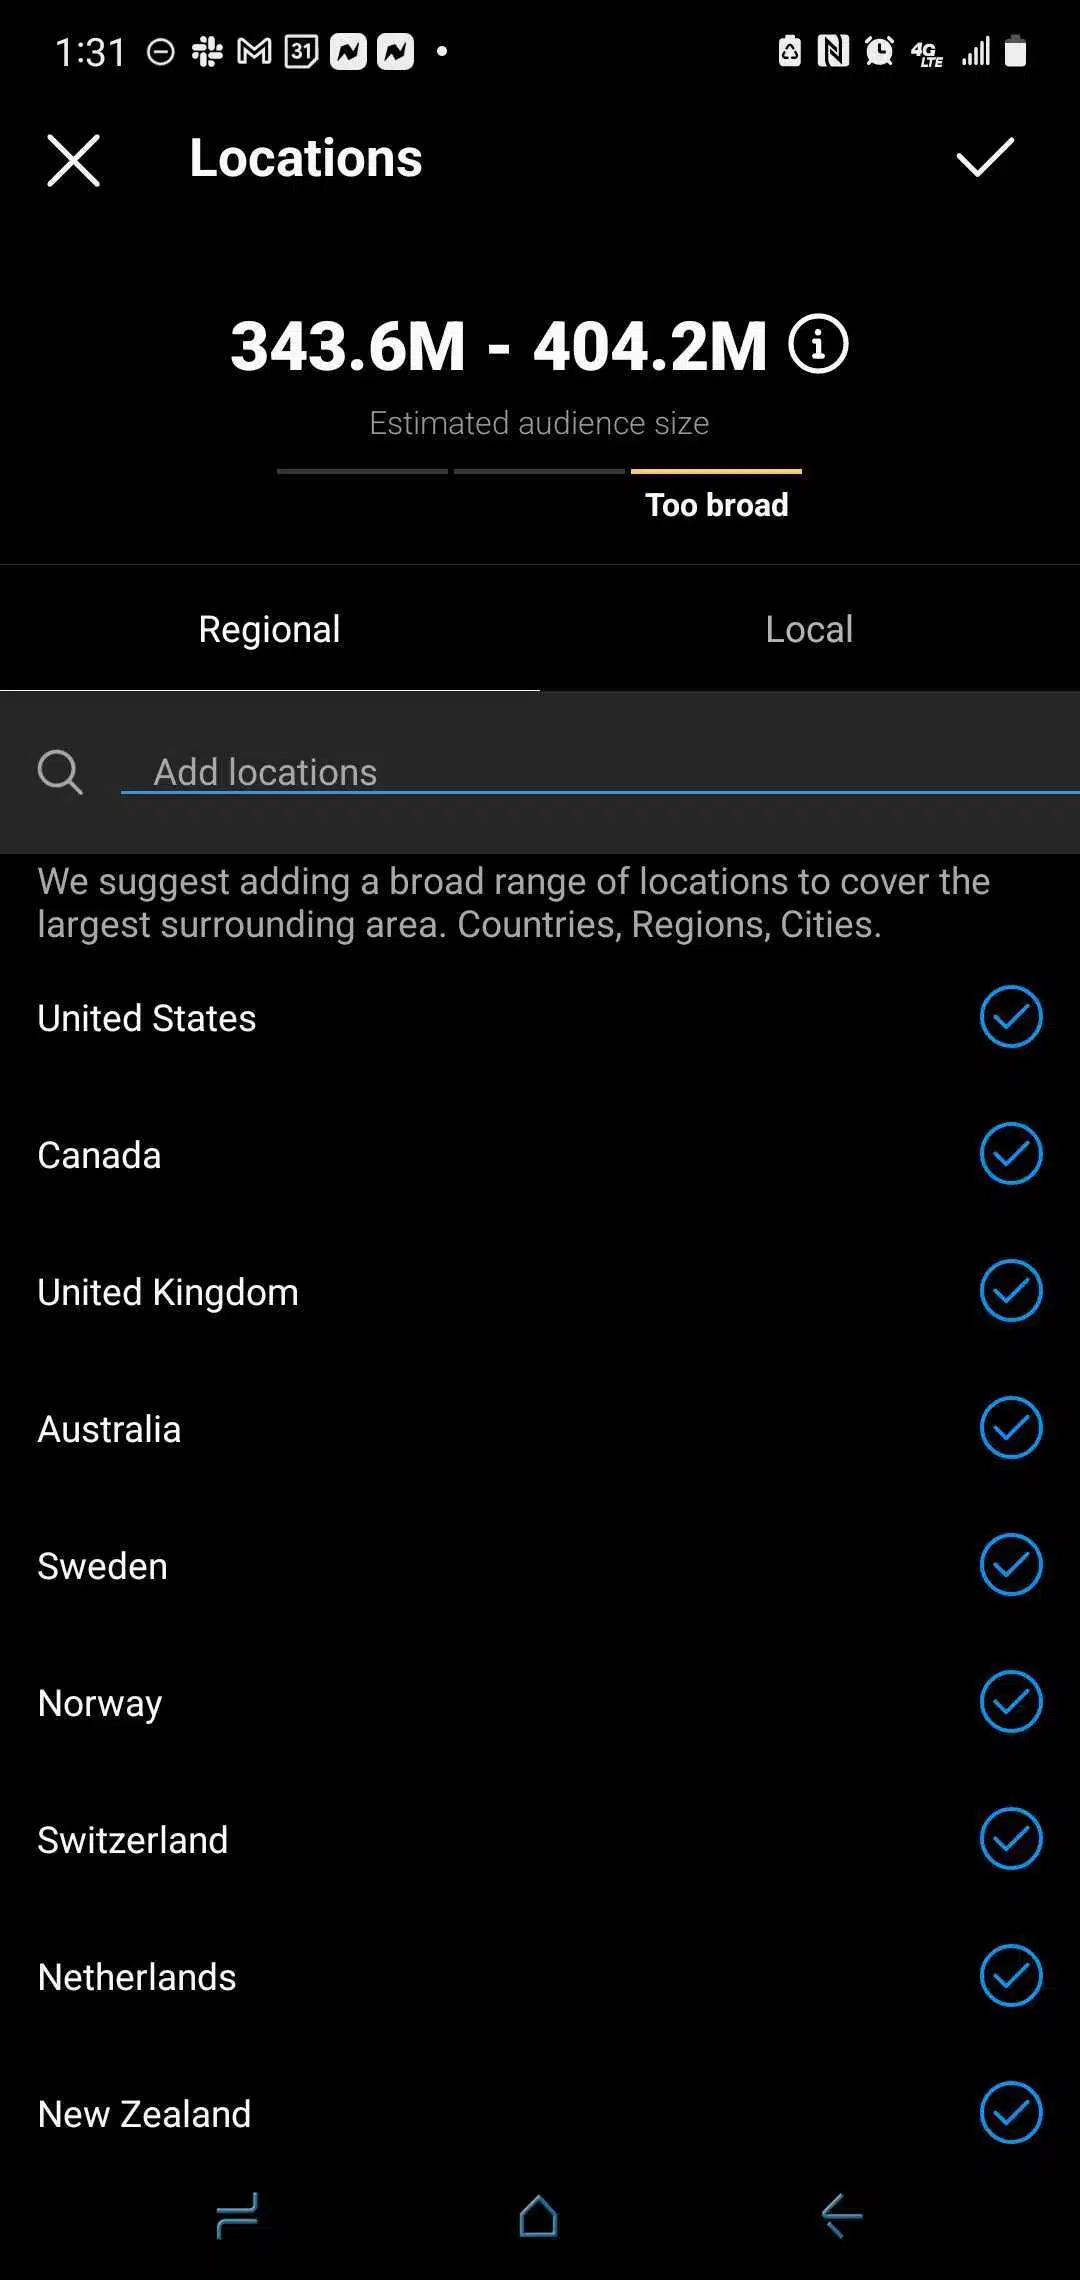
As you add your countries you’ll notice the audience size meter at the top will alert you that the audience is too broad. This will change once you set your target interests.
Once you have your green light countries selected, you’ll then be prompted to select targetable interests. You’ll want to start by using wide genre and similar artists interests. You can also create some audiences based on lifestyle and/or pop culture interests that match your ideal fan avatar and run some tests with these and compare.
*TIP* as you type in and select interests the audience size will change. Watch the meter and make sure your audience isn’t too broad or too small, that will have an impact on the effectiveness of your ad and your cost per result.
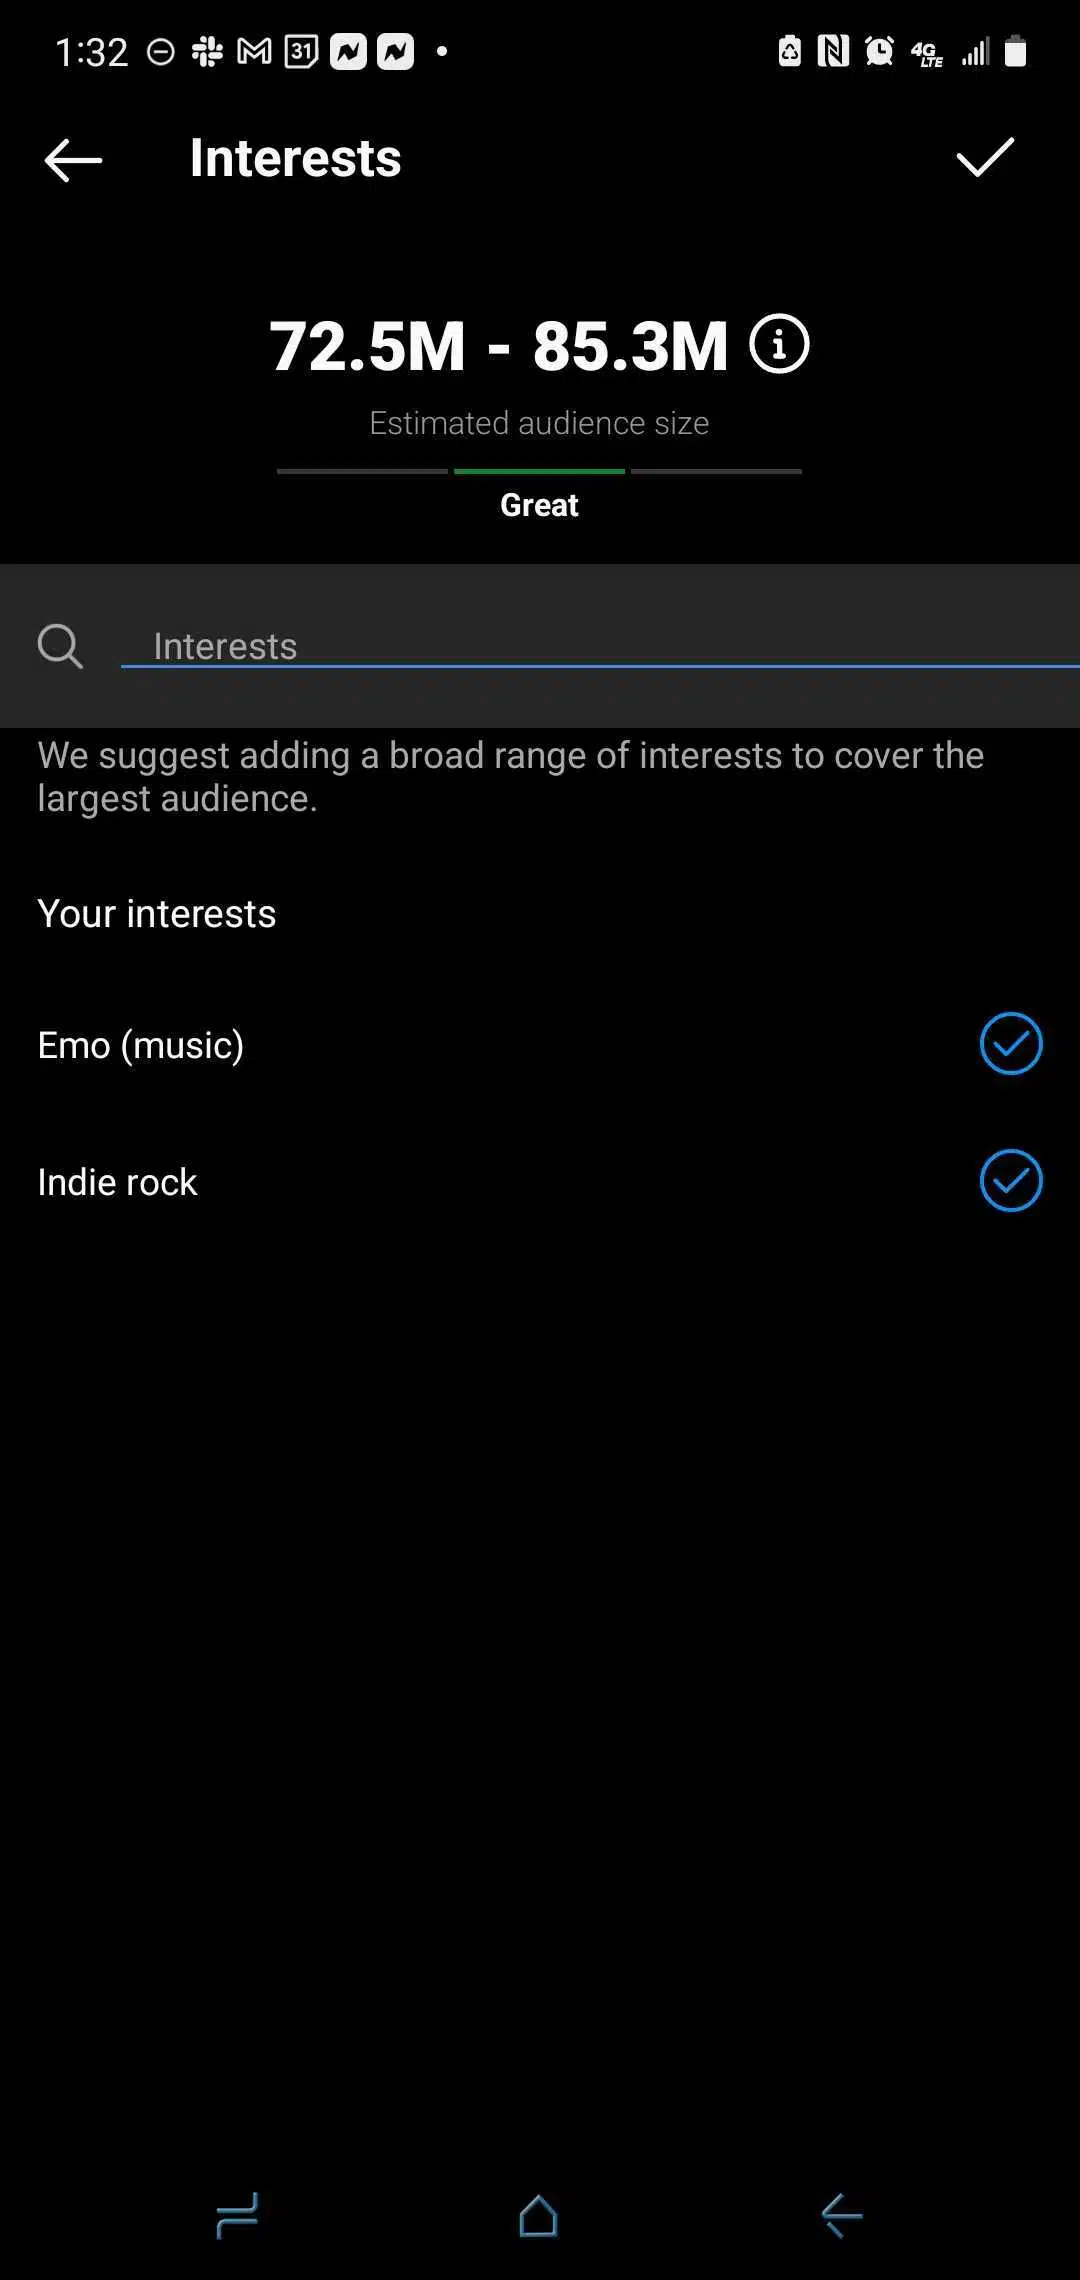
Once you finish selecting your interests, tap the check mark in the top right of the screen and you’ll see a summary of all the characteristics of the audience you just created. Be sure to leave your range as wide as it goes (18-65+) and keep the gender set to “All.”
The reason we want to keep things broad here, is because we want to feed the machine learning algorithm as much data as possible in order to effectively and efficiently learn who the best match is for your content.
Step 5:
Set Your Budget
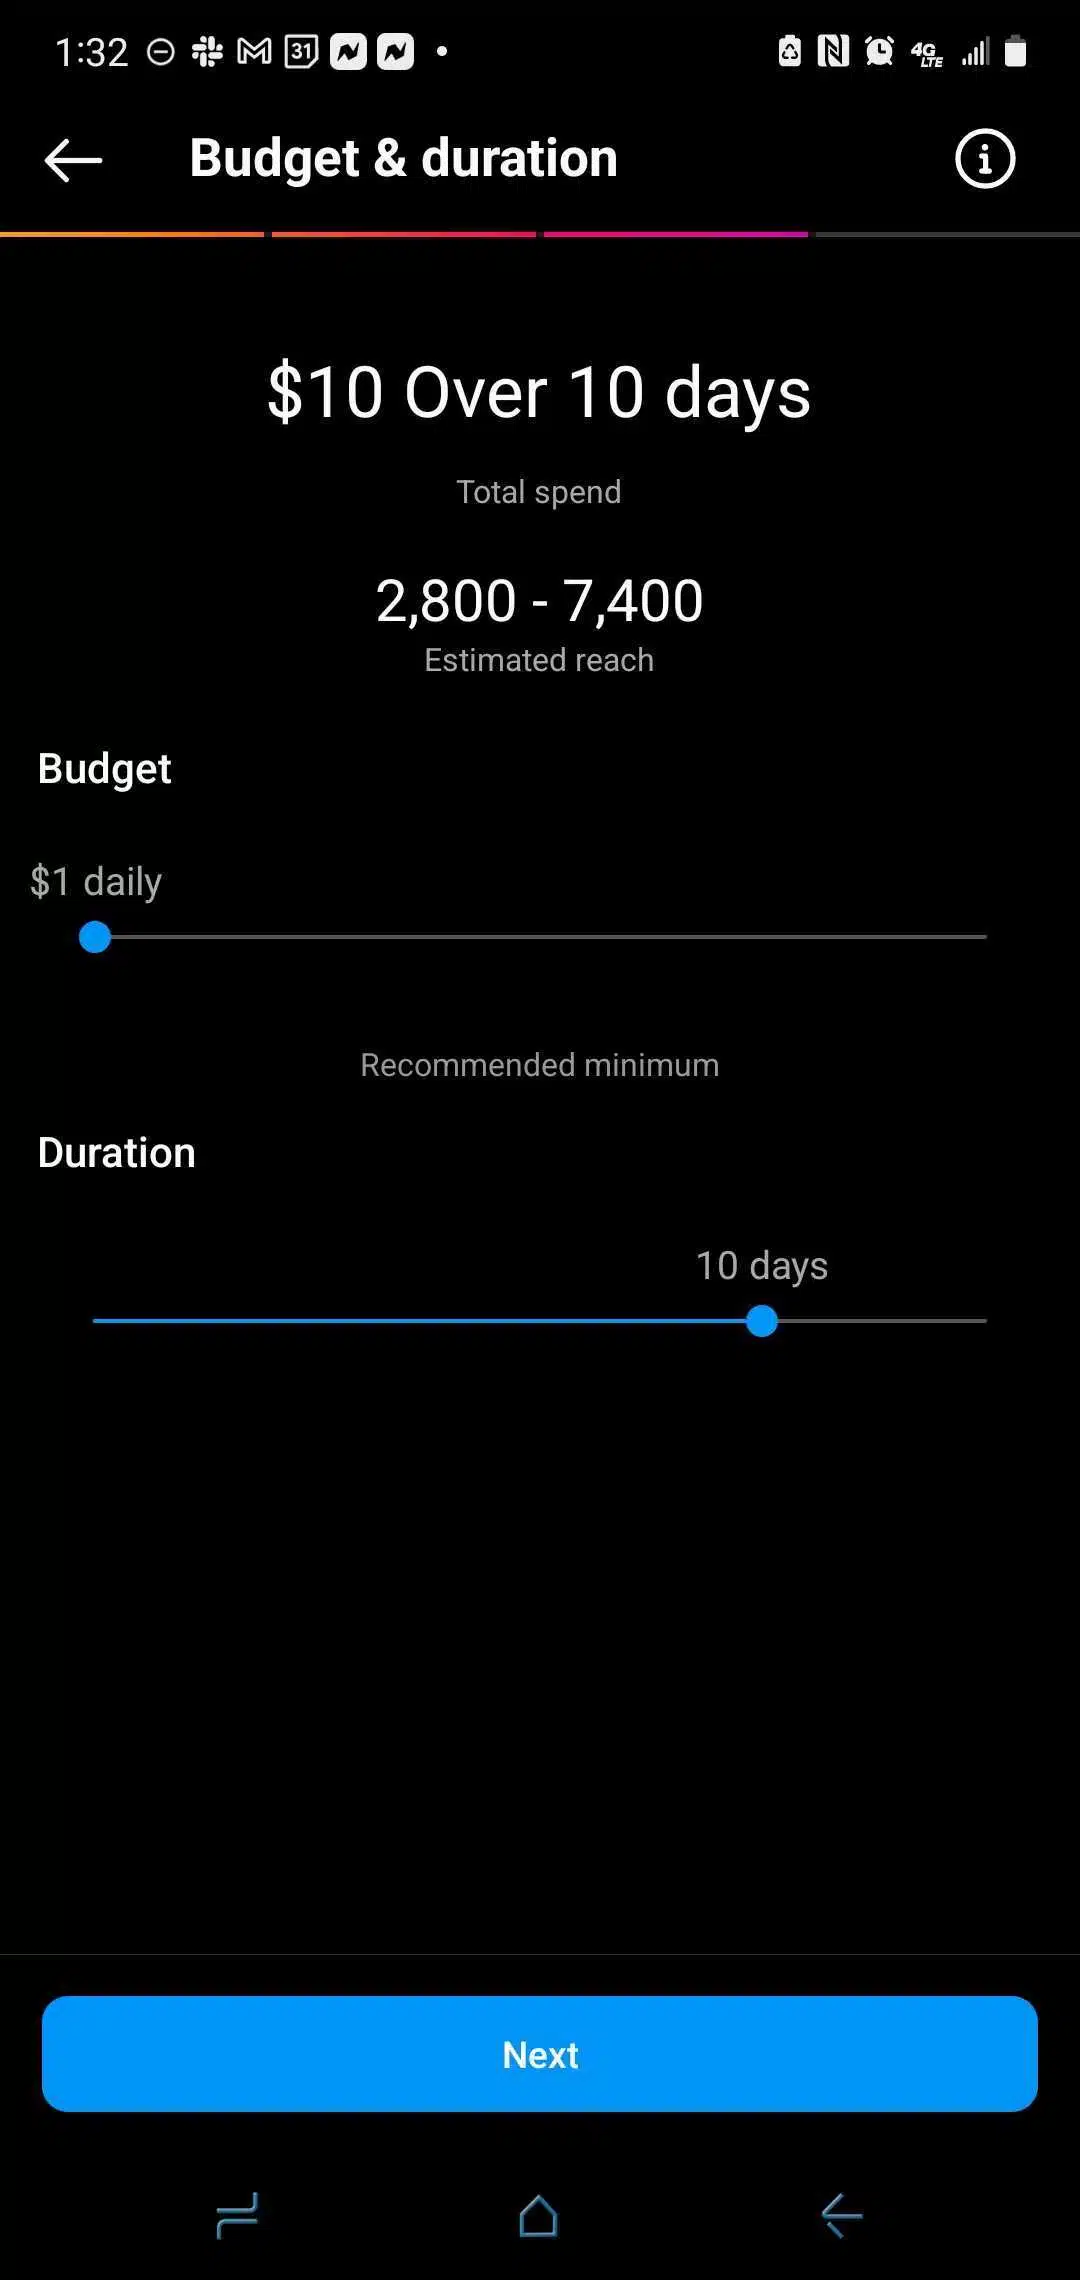
Once you’ve created your target audience, you’ll then be prompted to set a budget for your ad. You can set your budget to as much as $1000/day and as little as $1/day. If you’re reading this article, you’re looking for the poor man’s way, so we’ll be setting the budget to $1/day.
Next, you’ll set the time duration. Usually $5-$10 spend on a social ad is enough to collect the data needed to make decisions on whether or not you want to keep running it as is or make changes. So, you’ll want to set the time duration to at least 5 days or just run the ad for a week and see how things shake out.
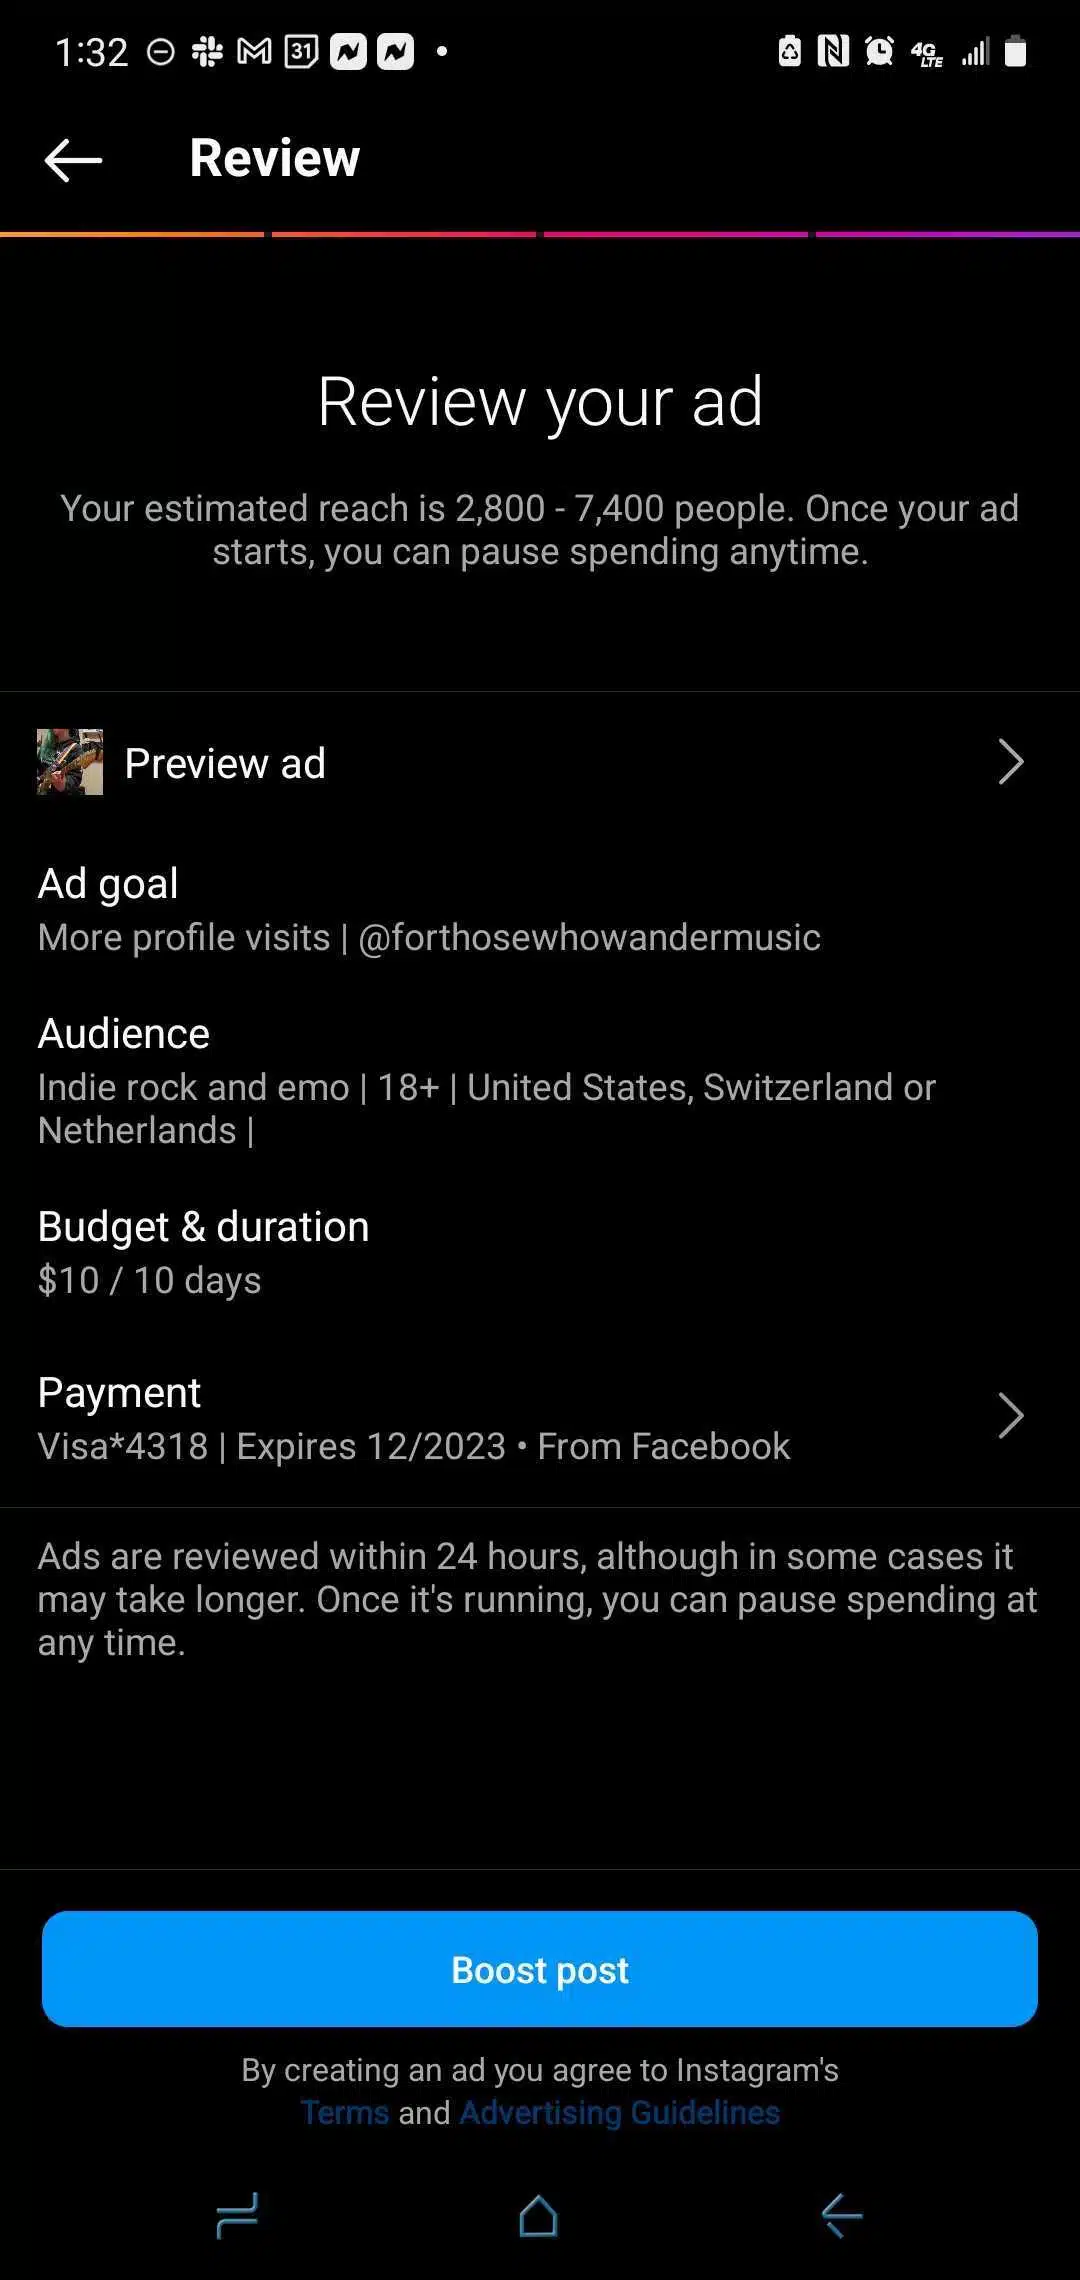
Next, you’ll see a review of everything you just built.
Be sure to check your payment method at the bottom and confirm those details are correct before continuing. If you need to make adjustments to anything before launching the ad you can do so from this screen. If you’re satisfied and nothing needs to be changed, you can tap “Boost post.” Before your ad runs, it will have to go through a review process. Usually, this takes no more than 24 hours.
Step 6:
Tracking Your Results
Over the next several days you’ll want to watch the results of your ad by going to your artist profile and tapping on “Ad tools.” Again, be sure you have a business profile or you won’t see this button!
You’ll be able to see what ads you’re currently running and to see more details on that specific ad select “View insights.” A new screen will appear that shows you how many reactions, comments, shares, and saves your ad has acquired at the top.
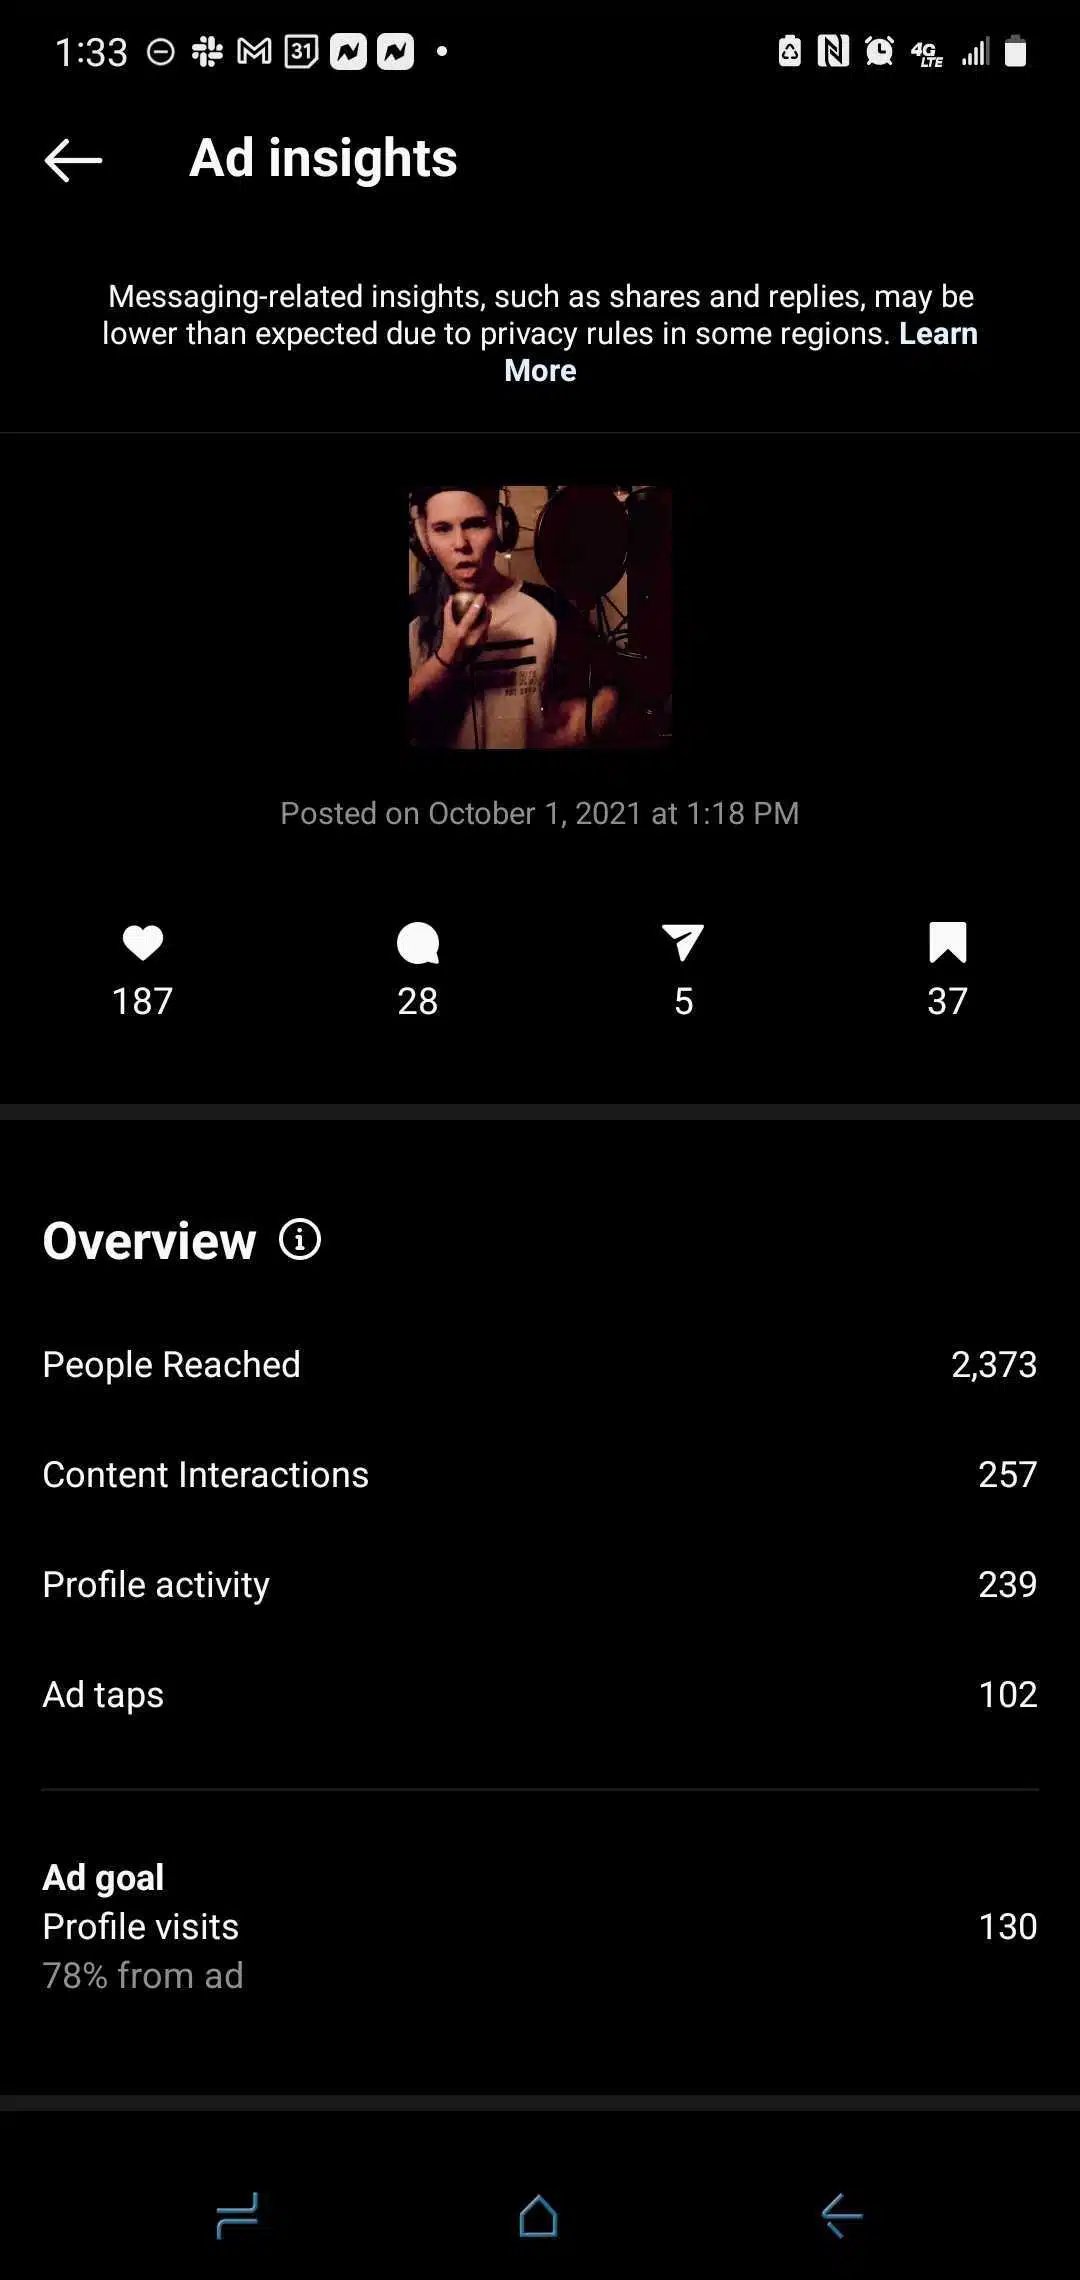
In the “Overview” section you’ll see:
- How many people you’ve reached
- How many total interactions
- Profile activity
- Ad taps
- Etc.
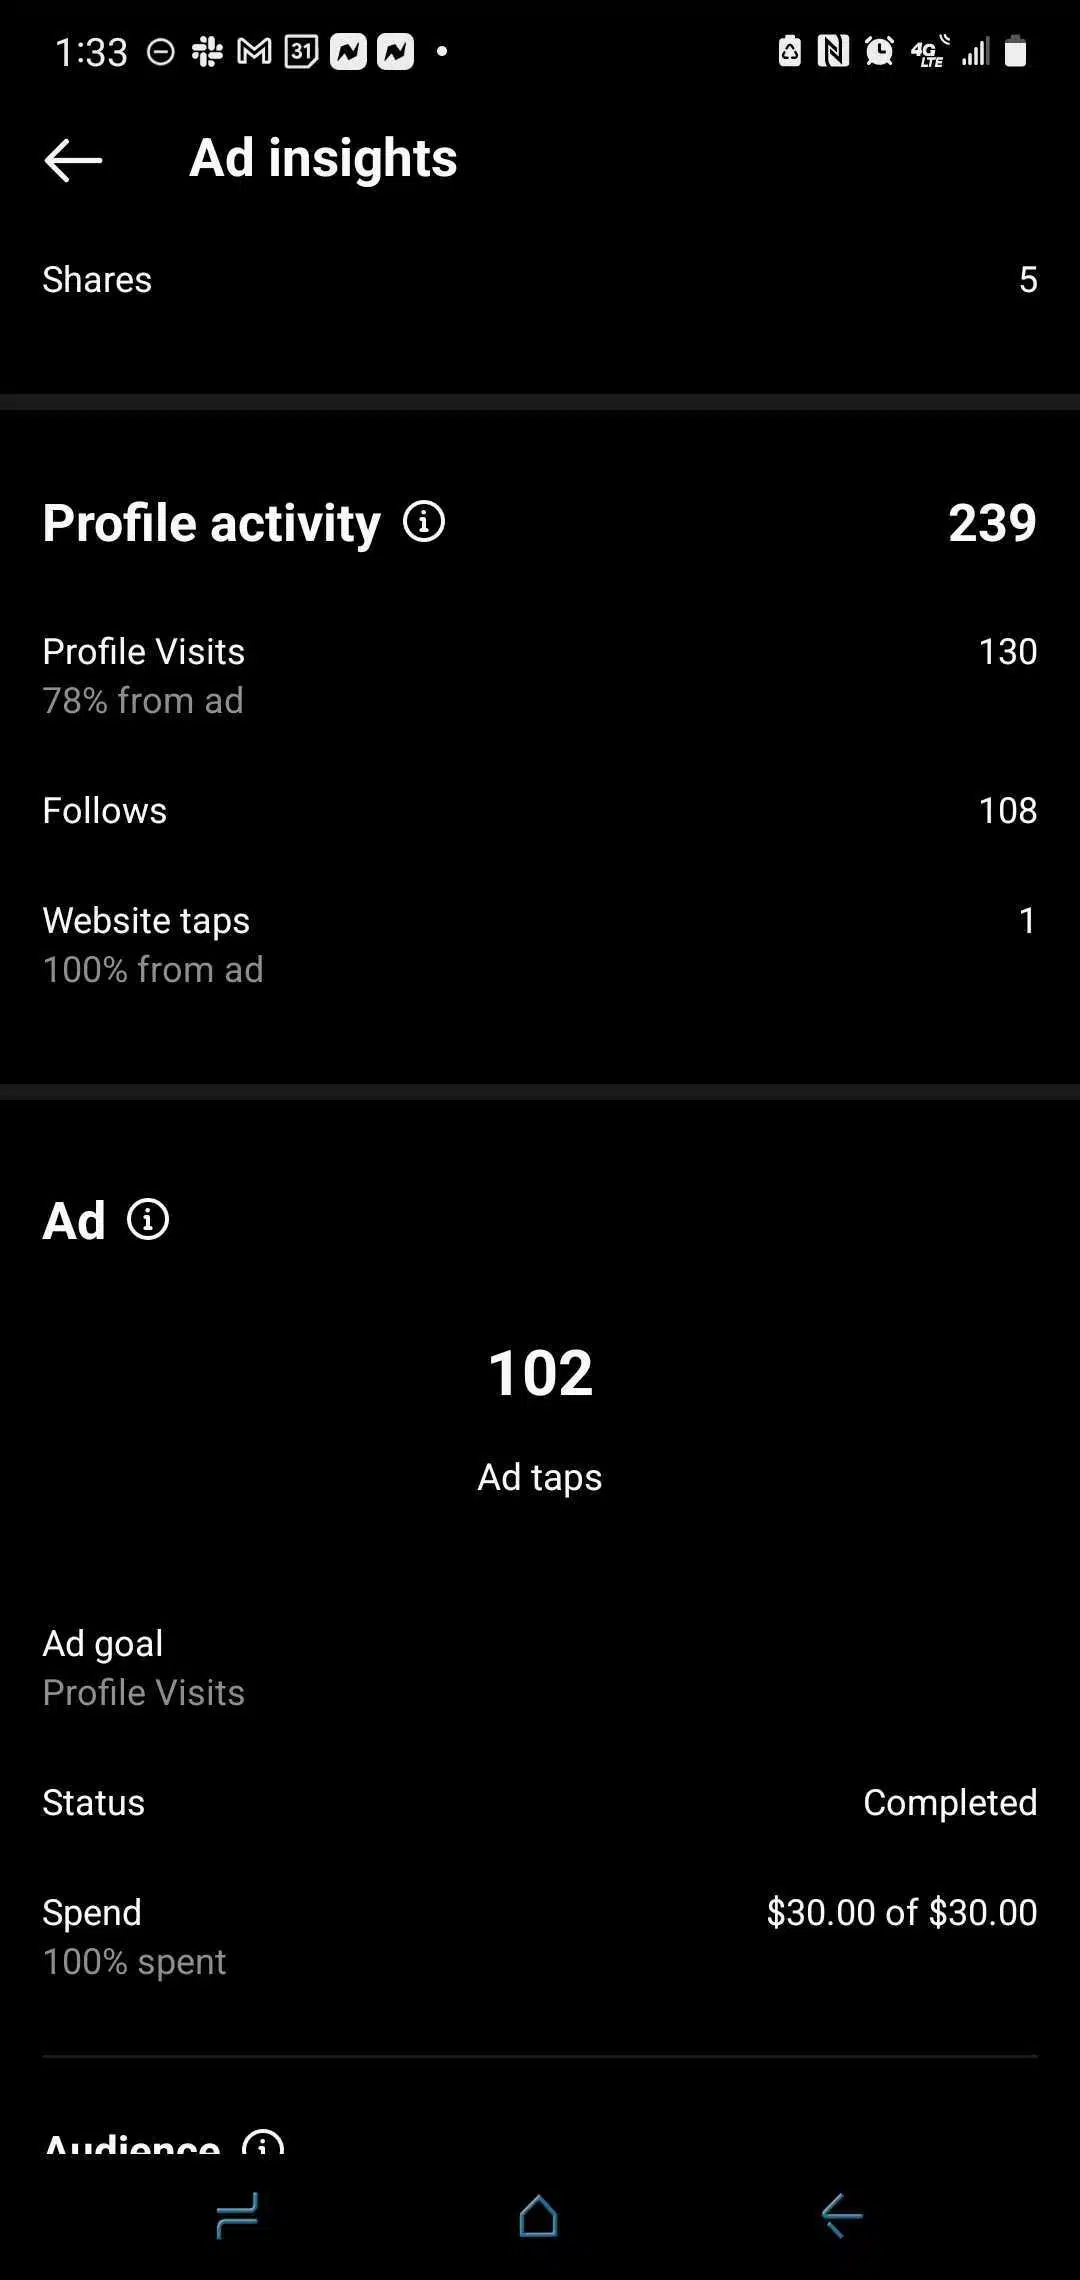
You’ll want to scroll down to the section titled “Profile Activity” and there you can see how many profile visits you’ve acquired and how many followers you’ve gained from running the ad.
You can calculate your cost per follower by dividing how much you’ve currently spent on the ad by how many followers you’ve gained. Your cost per follower will vary depending on your demographic, but you should aim to keep things under $1/follower. For indie artists and musicians, a $1/follower is considered a decent cost but if you can get under that you’ll be golden. As you run these ads you’ll be able to find where you land in that range and what your specific cost should be for your audience.
*TIP* if you notice a particular post is getting a lot of engagement, but you’re not gaining many followers, consider curating your feed with content that is top quality and matches the audience you’re targeting.
Content curation does play a role in this process. If your content doesn’t fit, or relate, to the audience you’re targeting you may struggle to translate paid traffic into follower growth.
Step 7:
Rinse Repeat and Experiment
Test, test, test. That is the name of the game when it comes to marketing your music. This strategy is simple and easy to duplicate over and over again. I recommend testing different audiences across a variety of different posts to find what works best for you. Just be sure to use posts that are central to your music so the engagement and followers you gain are based on an attraction to your art and not something irrelevant.
You want people to be fans of you because of your music first, the rest will come later 😉
If you want to learn more about growing a fanbase of real people who love your music and building a sustainable independent music career you can check out: https://indepreneur.io/join-indiepro
About the author:
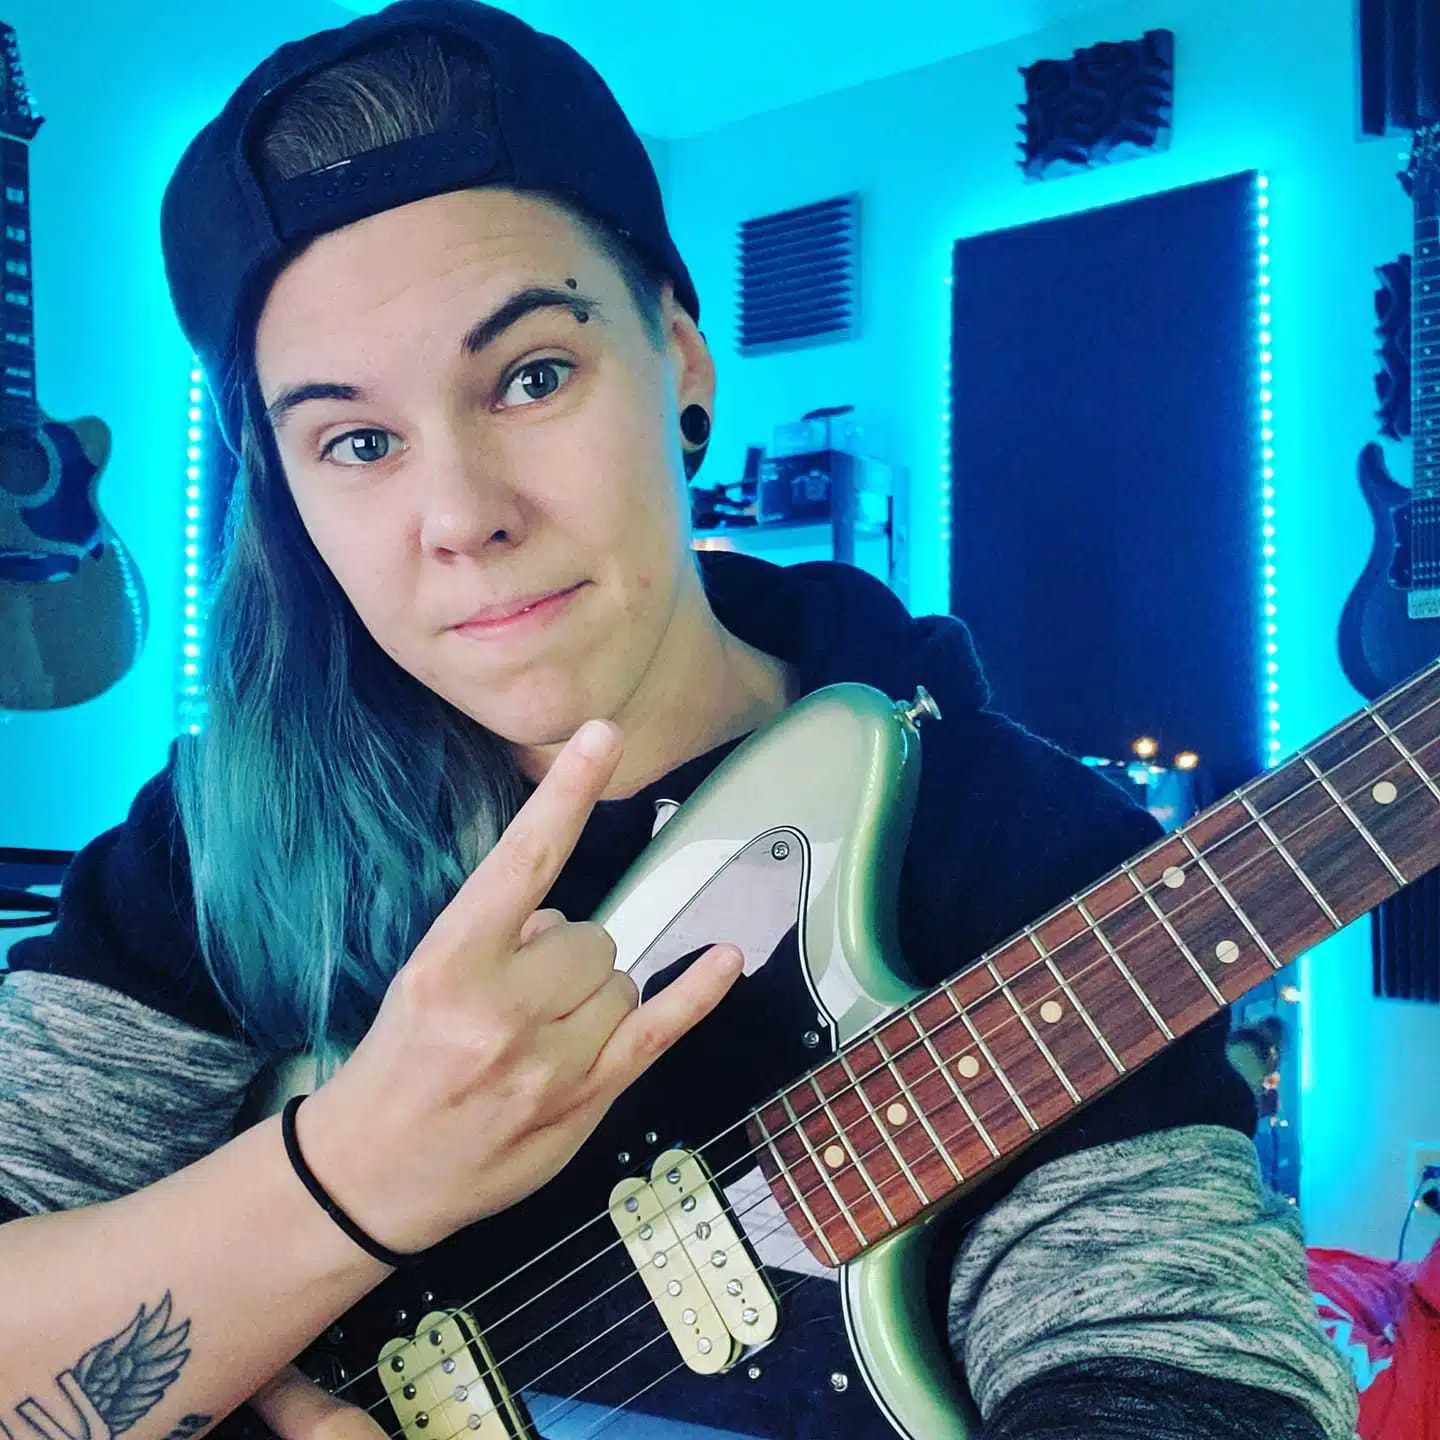
Shae has been a part of the Indepreneur community since the early days. She's been in a variety of musical environments and launched her new solo career using Indepreneur methods. She's been a crucial asset to the IndieX agency in helping clients find success with their Facebook Ads, Email Marketing, Album Launches, and generating ideas on how they can expand their merchandise and make cool sales offers to their fans.
If you are a member of our Indie Community and have a story to tell about your journey as an independent musician, reach out to Graci at support@indepreneur.io! We're always looking for new stories to share. If you aren't yet part of our Indie Community, you can get access to our entire library of music business trainings, our entire suite of exclusive discounts on partner products and services for musicians, our 4000+ private community of Indies, and weekly live stream Q&A's and coaching calls by signing up for INDIEPRO!
Just click below to join for a $1, 30-day trial and see what all the fuss is about 

